
Creating New Templates
You can create your own templates in the workflow catalog that you or your colleagues can use to render fuzzfiles and run workflows.
Begin by navigating to the workflow catalog and selecting “Create Template”.
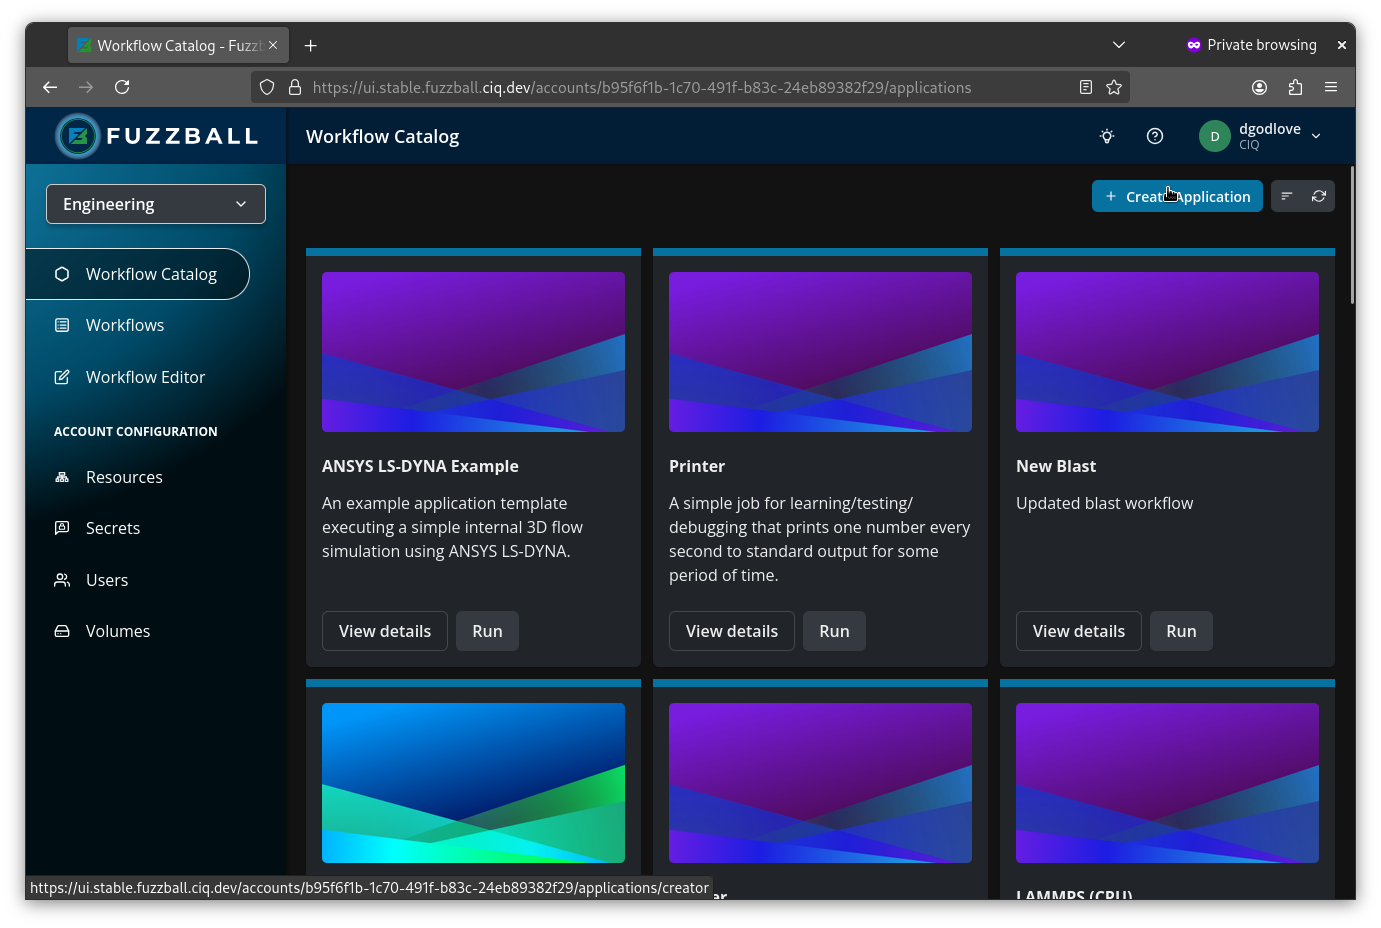
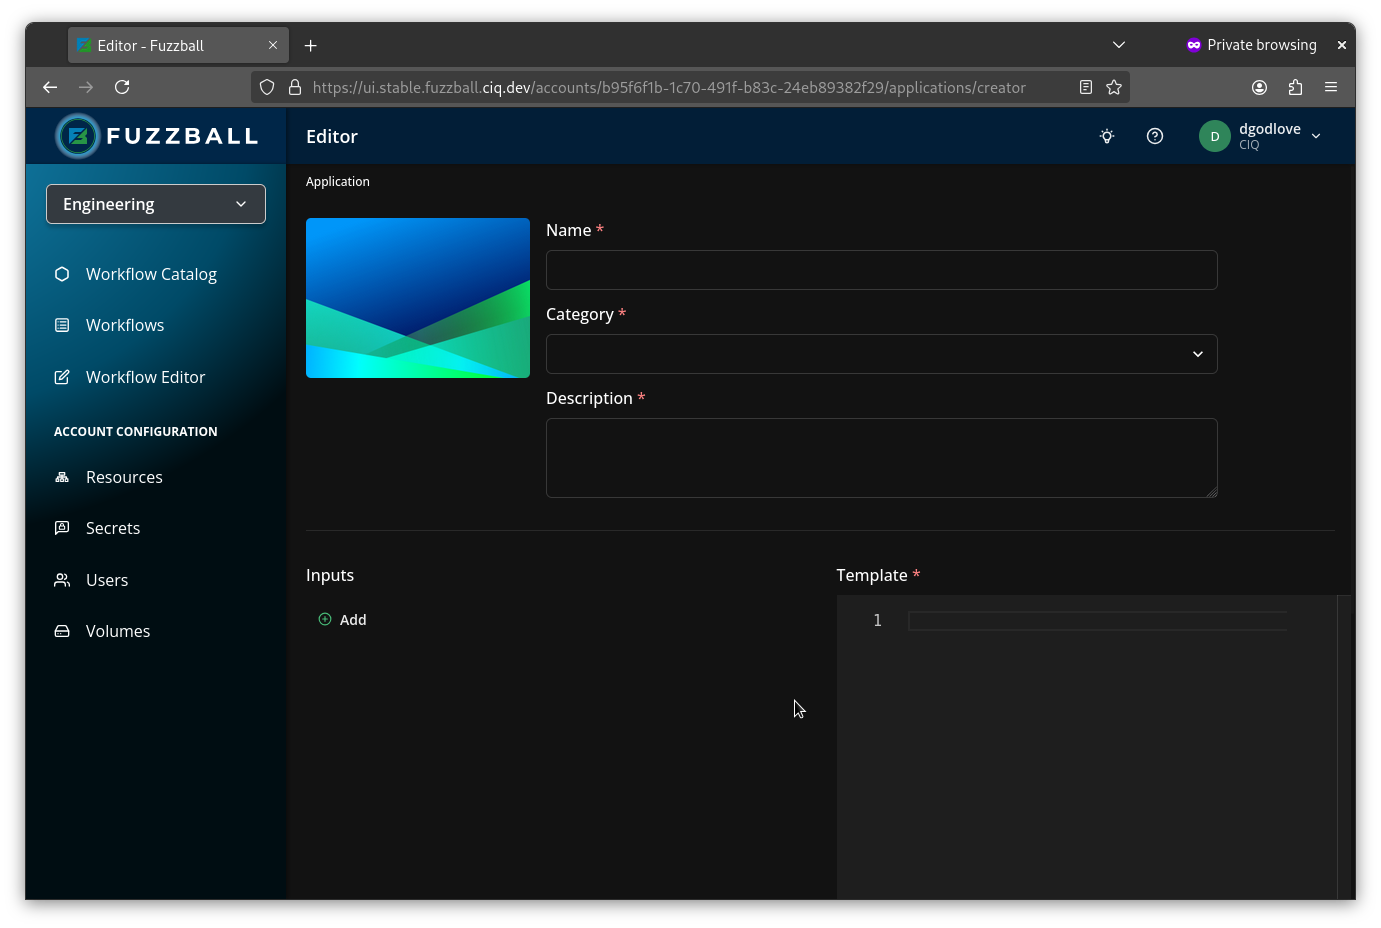
From here you can populate all of the fields. The Name, Category, and Description fields are
self-explanatory. You will need to provide a Template. This is a normal Fuzzfile with variables
inserted using double curly braces and a dot (i.e. {{.VariableName}}).
You might find it easy to create a fuzzfile using the Workflow Editor, and then replace specific values with variables.
The templating feature in the workflow catalog is implemented using Go text/template and slim-sprig. The latter allows you to do more complex operations like creating conditional logic!
Once you have your template specified, you can add inputs for all of your variables with ADD INPUT. Then save your template with SAVE at the top right of the page (DISCARD abandons it).
Name, Description, Category, and Template are all required. If any of them is empty, or an input’s variable name is invalid, saving is rejected: the editor lists the fields to fix and shows the specific problem next to each one.
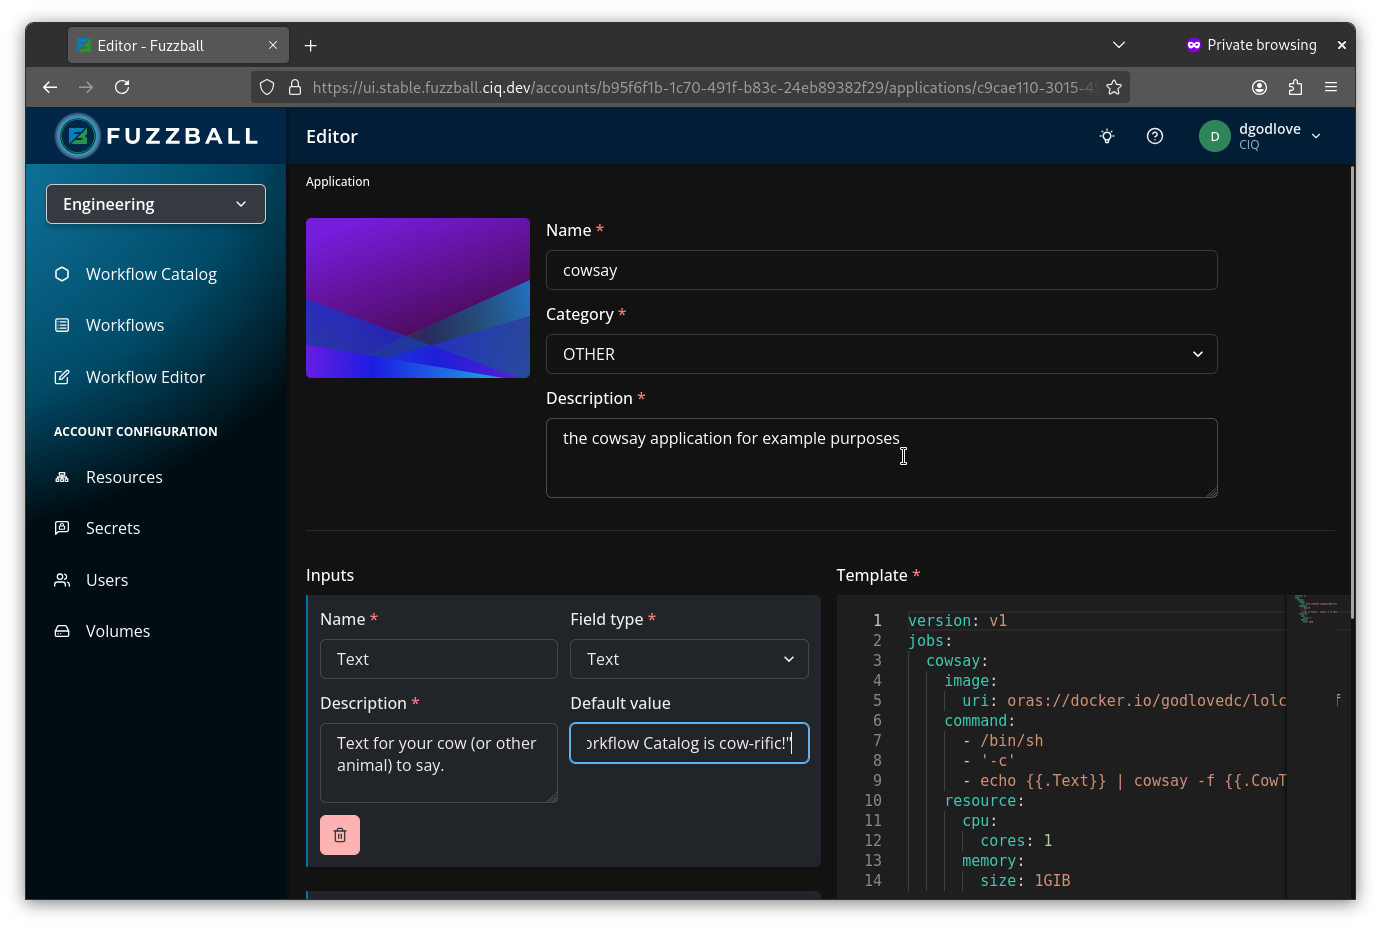
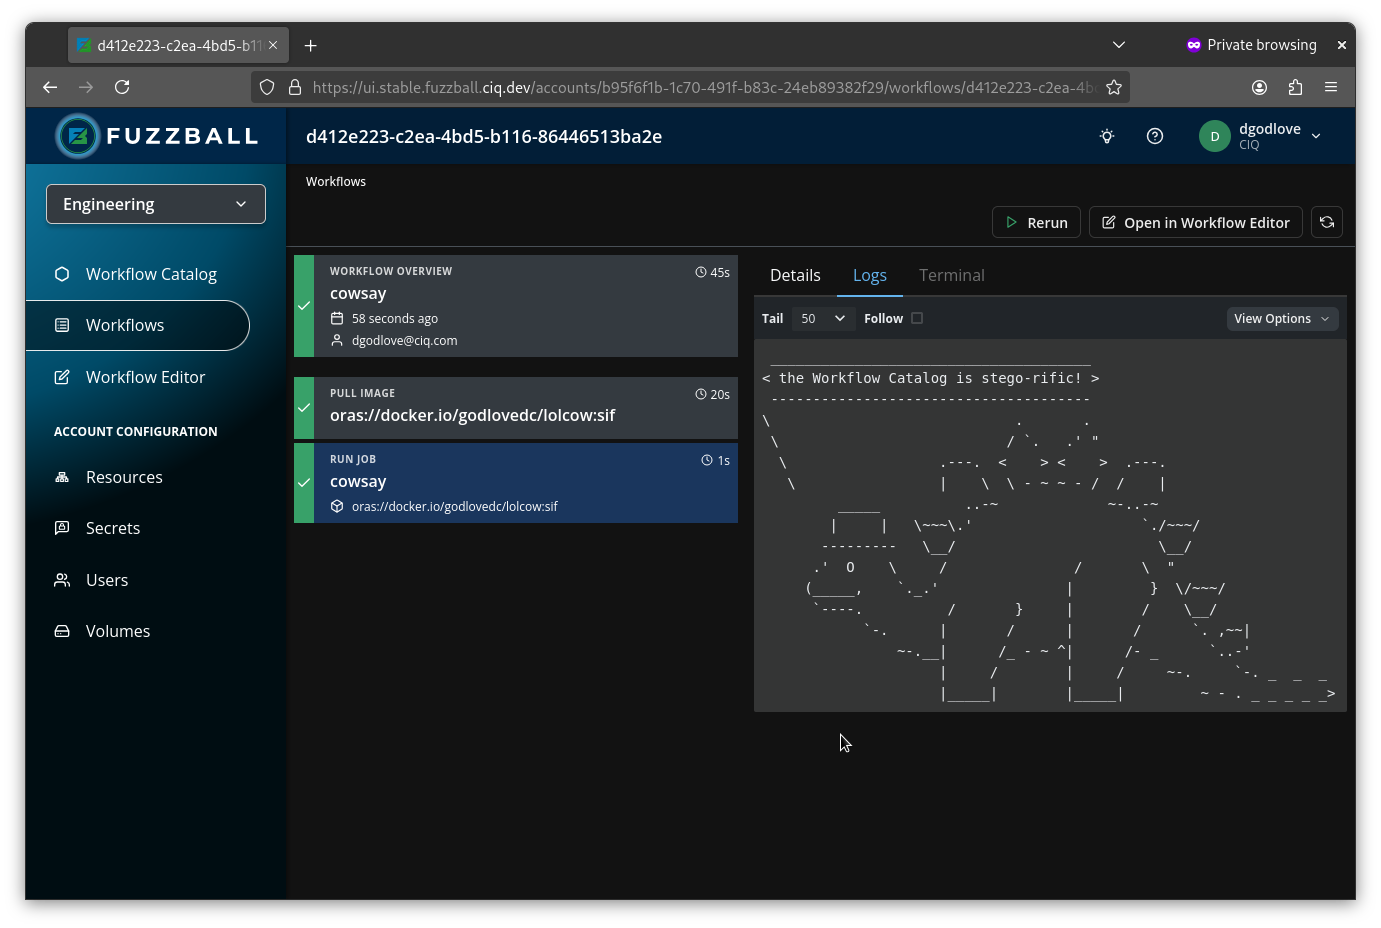
Now you are ready to test your new template! Find it in the workflow catalog and interact with it as described in the previous two sections.

To create a template in the workflow catalog using the CLI, you’ll need to manually author both a template file and a values file.
The template file is a YAML file with the syntax of a fuzzfile that also includes
placeholders for values you want users to customize. These placeholders use the syntax
{{.VariableName}}, where VariableName is a unique identifier for each parameterized value.
The templating feature in the workflow catalog is implemented using the Go text/template and slim-sprig. The latter allows you to do more complex operations like creating conditional logic!
Here’s an example template file for a simple “Hello World” workflow:
version: v4
jobs:
  helloworld:
    image:
      uri: {{.ContainerUri}}
    policy:
      timeout:
        execute: {{.Timeout}}
    script: |
      #!/bin/sh
      {{.Script}}
    resource:
      cpu:
        cores: {{.Cores}}
        affinity: NUMA
      memory:
        size: {{.Memory}}
It is important to provide users with additional details about the possible values for these variables and their purposes. This ensures clarity and helps prevent errors when rendering the fuzzfile. The values file serves this purpose.
The values file must define all variables used in your template. Here is an example corresponding to the “Hello World” template above:
values:
  - name: ContainerUri
    display_name: URI for the docker image to use for this workflow
    string_value: docker://alpine:latest
  - name: Timeout
    display_name: How long to wait for the workflow job to complete
    string_value: 5m0s
  - name: Cores
    display_name: How many CPU cores to allocate for the workflow job
    uint_value: 1
  - name: Memory
    display_name: How much memory to allocate for the workflow job
    string_value: 1GiB
  - name: Script
    display_name: Script to run for the 'hello world' job
    string_value: echo "Hello, world! Hostname ${HOSTNAME}"
Each entry for a variable has the following attributes:
- name: The variable name (without the dot prefix used in the template)
- display_name: A user-friendly explanation of what the variable does
- Value type: One of the following, depending on the data type:
string_value: For text values, durations, sizes, etc.uint_value: For unsigned integers (whole numbers)bool_value: For true/false values
The value type is indicated by the key name. The value of the key is the default value for the variable.
When defining template inputs in your values file, you can use several different value types depending on what kind of data the template parameter represents. Each input declares exactly one type; the key name selects the type and its value supplies the default.
The basic value types are:
string_value: For text values, durations, sizes, etc.uint_value: For unsigned integers (whole numbers)bool_value: For true/false values
These types were shown in the Hello World example earlier in this guide. There is no decimal type —
express fractional values as a string_value and quote them in the template if needed.
For workflow templates that include volume definitions, you can use volume_value to let users
select a volume. This type supports v4 volume semantics with structured fields:
values:
  - name: DataVolume
    display_name: Persistent data volume for analysis results
    volume_value:
      storage_provisioner_name: shared-nfs
      volume_name: analysis-data
volume_value supports these fields:
storage_provisioner_name: The name of the storage provisioner to use (corresponds to theuse:field in workflow volume definitions)volume_name: The name of a persistent volume (corresponds to thename:field in workflow volume definitions)reference: Legacy v1/v3 volume URI format (volume://<scope>/<class>[/<name>]) — retained for backward compatibility with older catalog data
New templates should use thestorage_provisioner_nameandvolume_namefields rather than the legacyreferenceformat. The structured fields align with v4 volume semantics and provide better clarity. See Storage Volumes and Workflows for details on v4 volume configuration.
Whichever form the values file uses, a volume_value input substitutes a single
volume://<scope>/<provisioner>/<volume> URI into the template, not the individual fields. Consume
it through a volume’s reference field, as shown under
Optional Template Inputs. To parameterize use: and
name: separately, declare two string_value inputs instead, as the next example does.
Here’s an example template that parameterizes a volume’s provisioner and name as two separate
string_value inputs:
Template file (data-processor-template.yaml):
version: v4

volumes:
  output:
    use: {{.OutputProvisioner}}
    name: {{.OutputVolume}}

jobs:
  process:
    image:
      uri: {{.ContainerUri}}
    mounts:
      /output:
        volume: output
    script: |
      #!/bin/sh
      {{.ProcessingScript}}
    resource:
      cpu:
        cores: {{.Cores}}
        affinity: NUMA
      memory:
        size: {{.Memory}}
Values file (data-processor-values.yaml):
values:
  - name: ContainerUri
    display_name: Container image for data processing
    string_value: docker://alpine:latest
  - name: OutputProvisioner
    display_name: Storage provisioner for output volume
    string_value: shared-nfs
  - name: OutputVolume
    display_name: Name of persistent output volume
    string_value: my-results
  - name: Cores
    display_name: CPU cores to allocate
    uint_value: 2
  - name: Memory
    display_name: Memory to allocate
    string_value: 4GiB
  - name: ProcessingScript
    display_name: Processing script to execute
    string_value: |
      echo "Processing data..."
      date > /output/timestamp.txt
For workflows that need persistent volumes, remember that the volume must already exist before the workflow runs. Users can create persistent volumes via the CLI (fuzzball volume create), web UI, or API. See Storage Volumes and Workflows for details.
If you are maintaining older catalog templates that use the v1/v3 volume URI format, you may see:
values:
  - name: DataVolume
    display_name: Data volume
    volume_value:
      reference: volume://group/shared/analysis-data
This legacy reference format continues to work for backward compatibility, but new templates
should use the structured storage_provisioner_name and volume_name fields instead.
You can organize your template values into logical categories to improve the user experience in the web UI. Categories group related parameters together, making it easier for users to understand and configure templates with many inputs.
To assign a category to a template value, add a display_category field to the value definition in your values file:
values:
  - name: ContainerUri
    display_name: URI for the docker image to use for this workflow
    display_category: Container
    string_value: docker://alpine:latest
  - name: Cores
    display_name: How many CPU cores to allocate for the workflow job
    display_category: Resources
    uint_value: 1
  - name: Memory
    display_name: How much memory to allocate for the workflow job
    display_category: Resources
    string_value: 1GiB
  - name: Timeout
    display_name: How long to wait for the workflow job to complete
    display_category: Execution
    string_value: 5m0s
  - name: Script
    display_name: Script to run for the 'hello world' job
    display_category: Commands
    string_value: echo "Hello, world! Hostname ${HOSTNAME}"
In this example, the template values are organized into four categories:
- Container: Groups container image settings
- Resources: Groups CPU and memory parameters
- Execution: Groups timeout and run-time settings
- Commands: Groups script and command settings
Use clear, descriptive category names: Choose category names that clearly indicate what kind of parameters they contain (e.g., “Storage”, “Networking”, “Security”).
Group related parameters: Put parameters that users typically configure together in the same category (e.g., all resource limits, all volume settings).
Keep categories focused: Avoid creating too many categories for a small number of parameters. Generally, 2-5 categories work well for most templates.
Use consistent naming: If you create multiple templates, use the same category names for similar types of parameters across templates to provide a consistent experience.
Categories are optional: You can omit the
display_categoryfield for a template value. Values without adisplay_categoryrender as ordinary top-level inputs rather than inside a collapsible category section.
The display_category field only affects the web UI presentation when users run templates. In the “Run Template” dialog, each category appears as its own collapsible section labeled with the category name and the number of fields it contains; values without a category are shown directly above these sections.
Categories do not affect:
- CLI rendering or interactive prompts
- The order of template variable substitution
- The rendered Fuzzfile output
- Template validation or execution
Once you’ve created both files, add the template to the workflow catalog using the create
command:
$ fuzzball workflow catalog create <TEMPLATE_FILE> <VALUES_FILE> [flags]For example:
$ fuzzball workflow catalog create hello-world-template.yaml hello-world-values.yaml \
  --name "Hello World" \
  --description "A simple Hello World example" \
  --category "EXAMPLES"

Application created with ID: 00000000-0000-0000-0000-000000000000
Find your template listed amongst the other templates in the workflow catalog by using the
fuzzball workflow catalog list command.
When creating templates, you can design secret and volume inputs to be optional. This allows users to render the template without providing values for those inputs when the secrets or volumes are not needed for their specific use case.
To create a template that supports optional secret or volume inputs, declare the inputs in your
values file with an empty secret_value: {} or volume_value: {} entry, then structure your
template workflow to handle the case where the input is left empty at render time.
Write the empty declaration assecret_value: {}orvolume_value: {}, including the braces. A baresecret_value:with nothing after it is YAMLnull, which leaves the input with no type at all; the template can then never be rendered (“unknown template value type”). The braces declare a secret or volume input whose default is unset.
Rendering substitutes the reference the user selected — secret://<scope>/<name> for a secret
input, volume://<scope>/<provisioner>/<volume> for a volume input — or an empty string when the
input was left unset. Wrap the parts of the workflow that consume the reference in a conditional so
the empty case produces a valid fuzzfile.
Secret references are consumed by the workflow fields that accept them: a job’s image.secret and
image.decryption-secret, the secret field of a volume’s ingress source or egress destination,
and a KEY=secret://... entry in a job’s env list. Here’s a template that authenticates its
request only when the user supplies a token:
version: v4
jobs:
  fetch-data:
    image:
      uri: {{.ContainerUri}}
    {{- if .ApiToken}}
    env:
      - API_TOKEN={{.ApiToken}}
    {{- end}}
    script: |
      #!/bin/sh
      {{- if .ApiToken}}
      curl -H "Authorization: Bearer $API_TOKEN" {{.ApiEndpoint}}
      {{- else}}
      curl {{.ApiEndpoint}}
      {{- end}}
When ApiToken is supplied, its value is a secret reference (secret://<scope>/<name>), so
API_TOKEN={{.ApiToken}} becomes an environment-variable secret that Fuzzball resolves into the
job’s API_TOKEN variable. When it is left blank, the {{if .ApiToken}} guard omits the env
block entirely and the request runs without authentication.
Environment-variable secrets accept onlyuser-scoped secrets of type “value”. A user who picks agroup-scoped secret, or a secret of another type, getsonly user secret scope is allowed with environment variable secretswhen the workflow is submitted. Say so in the input’sdisplay_name, or consume the reference throughimage.secretor a volume’s ingress or egresssecretfield, which accept every scope.
The corresponding values file:
values:
  - name: ContainerUri
    display_name: Container image to use
    string_value: docker://alpine:latest
  - name: ApiEndpoint
    display_name: API endpoint to fetch data from
    string_value: https://api.example.com/data
  - name: ApiToken
    display_name: Optional user-scoped API token secret (leave blank for public endpoints)
    secret_value: {}
A volume input supplies a reference for an entry in the workflow’s top-level volumes section; the
job mounts it by name through mounts. Both the volume declaration and the mount must be inside the
conditional, since a mount that names an undeclared volume is invalid:
version: v4
{{- if .InputVolume}}
volumes:
  input-data:
    reference: {{.InputVolume}}
{{- end}}
jobs:
  process-data:
    image:
      uri: {{.ContainerUri}}
    {{- if .InputVolume}}
    mounts:
      /data/input:
        volume: input-data
    {{- end}}
    script: |
      #!/bin/sh
      {{- if .InputVolume}}
      process-files /data/input/*
      {{- else}}
      echo "No input data provided, using defaults"
      process-defaults
      {{- end}}
When InputVolume is supplied, its value renders to a volume reference that Fuzzball resolves to
the use:/name: of an existing persistent volume, which is then attached through the job’s
mounts: map. When it is left blank, the {{if .InputVolume}} guards omit both the top-level
volumes: entry and the mount, and the job falls back to its default behavior.
The corresponding values file:
values:
  - name: ContainerUri
    display_name: Container image to use
    string_value: docker://myapp:latest
  - name: InputVolume
    display_name: Optional input data volume (leave blank to use defaults)
    volume_value: {}
A volume input substitutes a volume://<scope>/<provisioner>/<volume> URI, so the volume entry
consumes it through the deprecated reference field rather than the preferred use/name pair.
Fuzzball converts reference to use/name when the workflow runs. See
volumes in the Fuzzfile syntax reference.
The conditional logic shown in the examples above ({{if .Var}}) is part of the Go text/template
functionality used by workflow catalog templates. Because empty secret and volume references are
accepted during rendering, these conditionals can be used to handle optional inputs. Every {{if}}
needs its matching {{end}} — an unclosed conditional fails the render with
unexpected EOF.
When designing templates with optional inputs:
- Empty values are valid: An empty secret or volume reference does not cause validation errors during rendering. A non-empty reference is still format-checked, so a malformed reference is still rejected
- Conditional logic handles presence: Use Go template conditionals to include or exclude workflow sections based on whether optional inputs are provided
- Guard every use of the reference: The rendered fuzzfile must be valid in both branches. A field left holding an empty reference, or a mount naming a volume that was not declared, fails when the workflow is submitted
- Default behavior: Structure your template to provide sensible default behavior when optional inputs are omitted