
Adding Dependent Jobs and Volumes
Let’s expand on the previous example by creating a second job that will run after the first job. In
our example, the second job should take the fortune generated by the fortune command in the first
job and reformat using the command cowsay.
To accomplish this, we need a place to save the fortune created by the first job and to read it in to the second job. So in addition to adding a second job, we will create an ephemeral Volume that enables sharing data between jobs within a workflow.
This example requires that you are able to create ephemeral volumes. If you cannot do so, you may need to contact your administrator to gain the appropriate permissions.
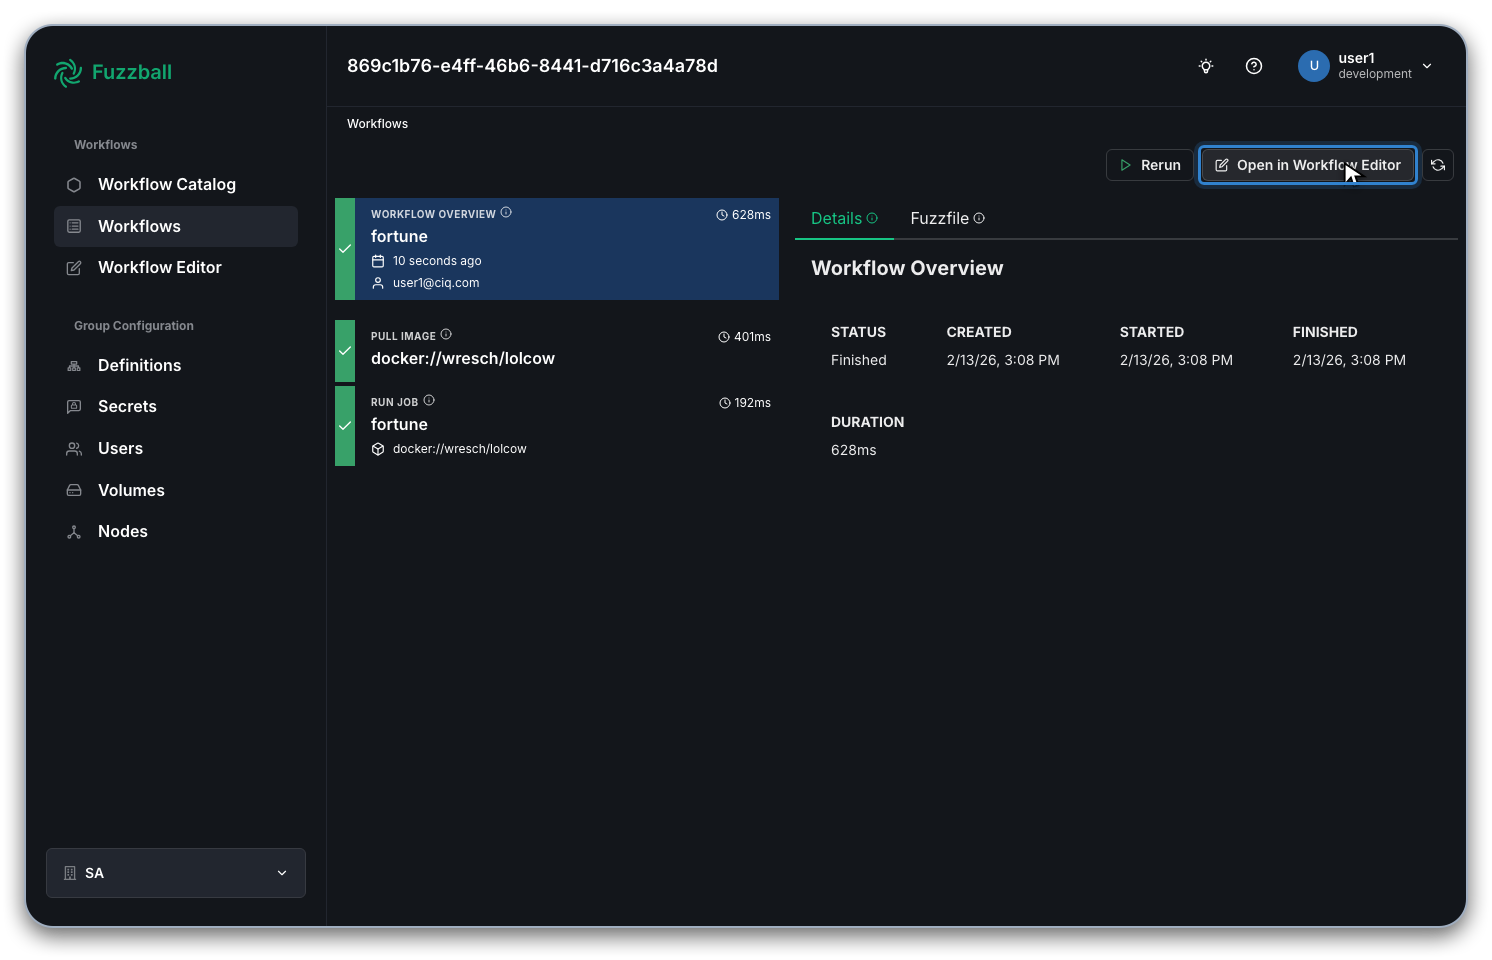
You can open the workflow that we created in the last example in the Workflow Editor. If it is not
already open you can navigate to the Workflows page (on the left), find the workflow that you
executed in the last example containing the fortune command, open it in the workflow dashboard,
and select “Open in Editor” in the upper right.
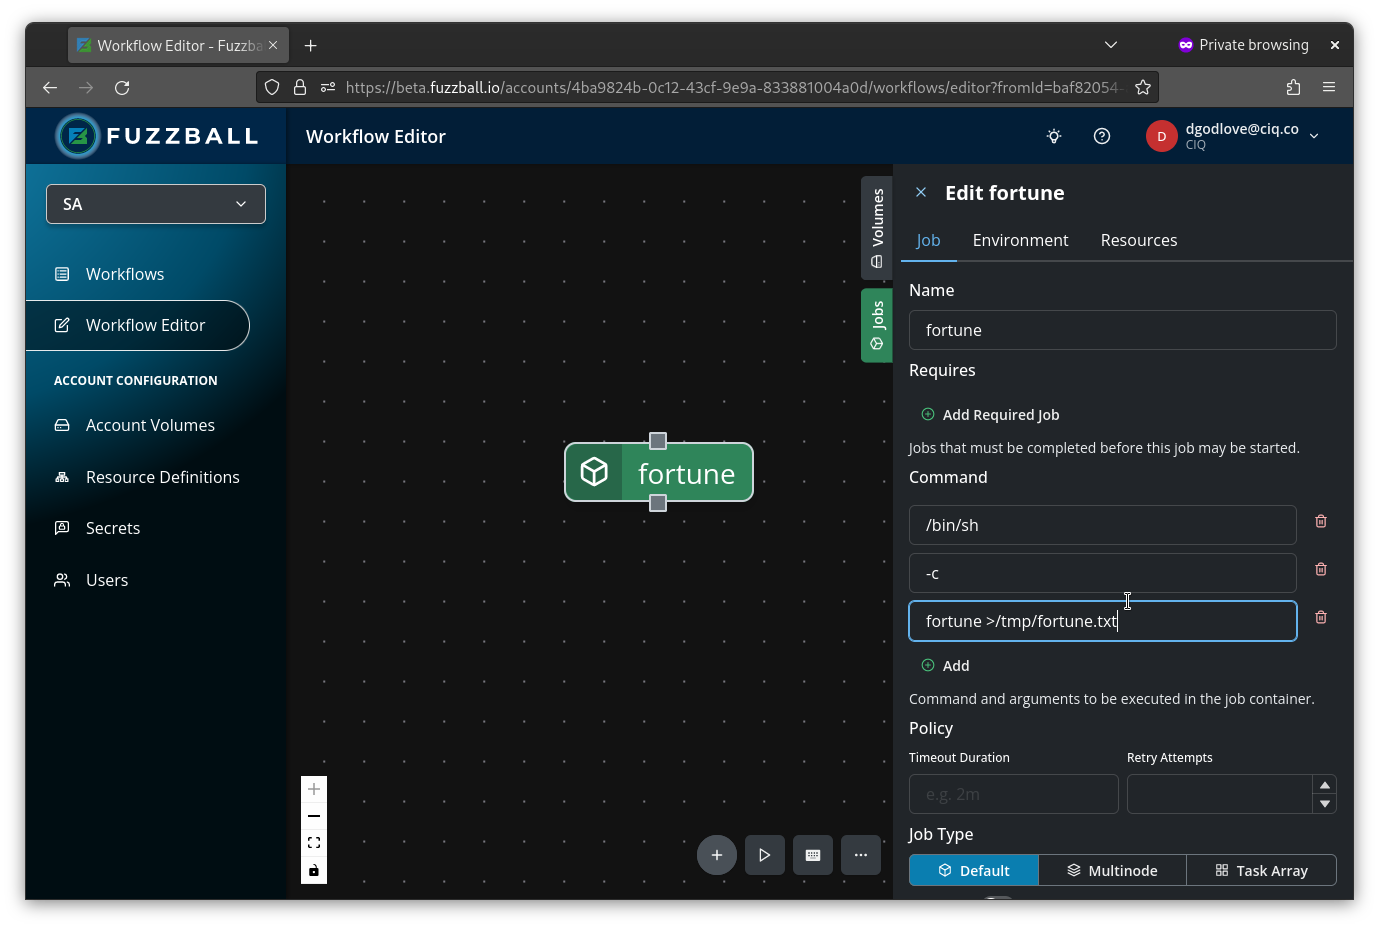
First, we need to save the output from our fortune command somewhere. You can start by clicking on
the job so that it is selected and the job configuration panel opens on the right hand side.
You can edit the job so that standard output is redirected to a file called /tmp/fortune.txt.
The command should be this:
fortune >/tmp/fortune.txt
This is a good start, but /tmp is specific to this
container and will not
persist between jobs. So we need to set up a
volume that the jobs (when we have more than one) can share.
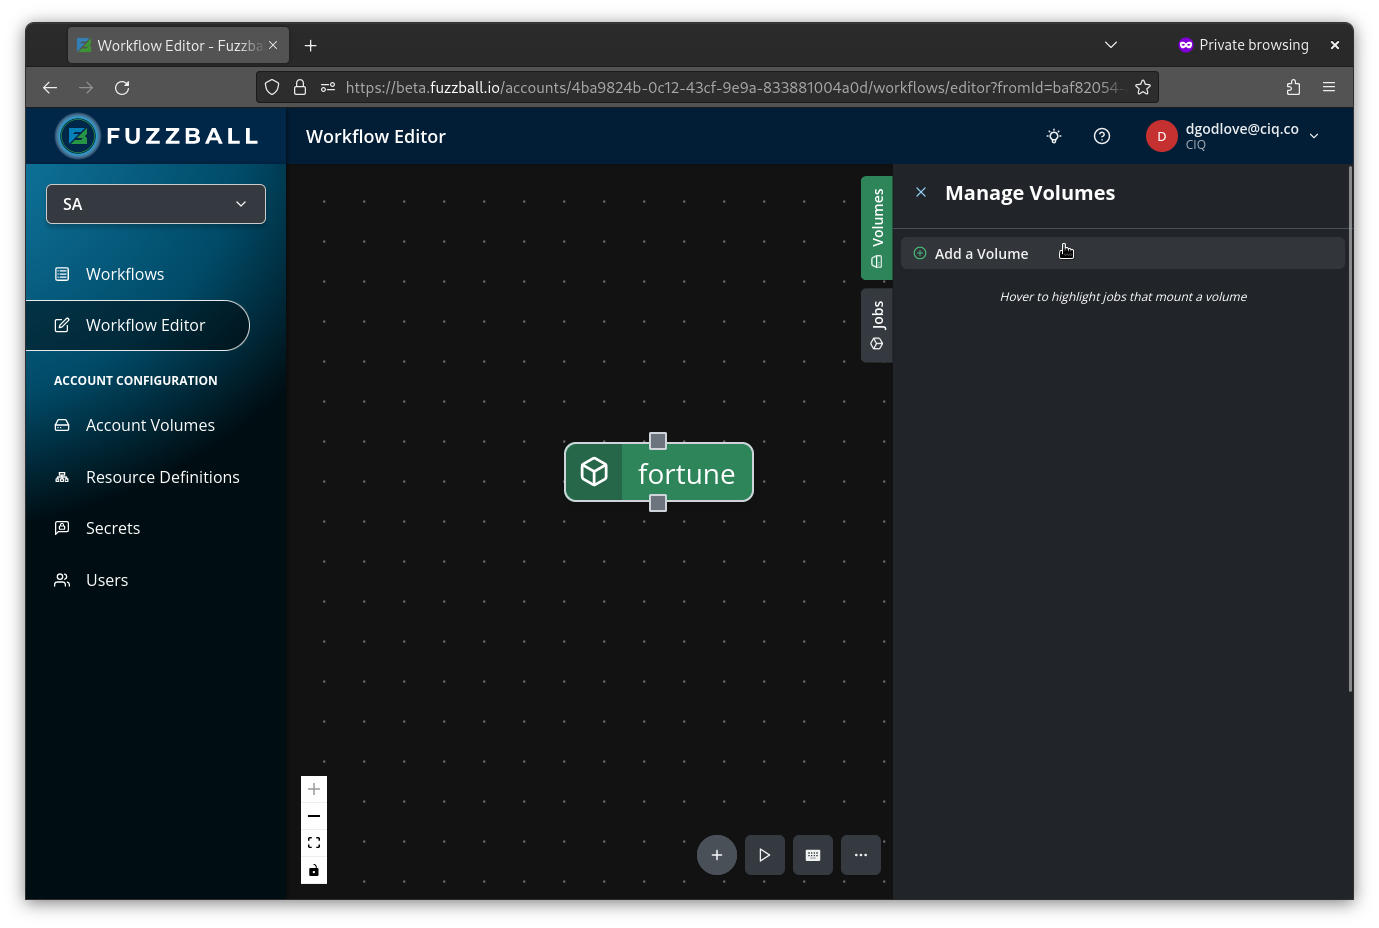
You can start by dragging a volume from the toolbox at the top of the canvas onto the grid, just as you did with the job:
Now you can define a new ephemeral volume
for the jobs in this workflow to use. In our case, we already have a
storage provisioner
configured by our administrator. Here you can see that we’ve given our volume the reference
label test-volume — this is the key used to refer to this volume elsewhere in the workflow
(e.g., in job mounts). Because we are not setting a persistent volume name, this volume will
be created as ephemeral storage when the workflow runs and automatically cleaned up when it
completes.
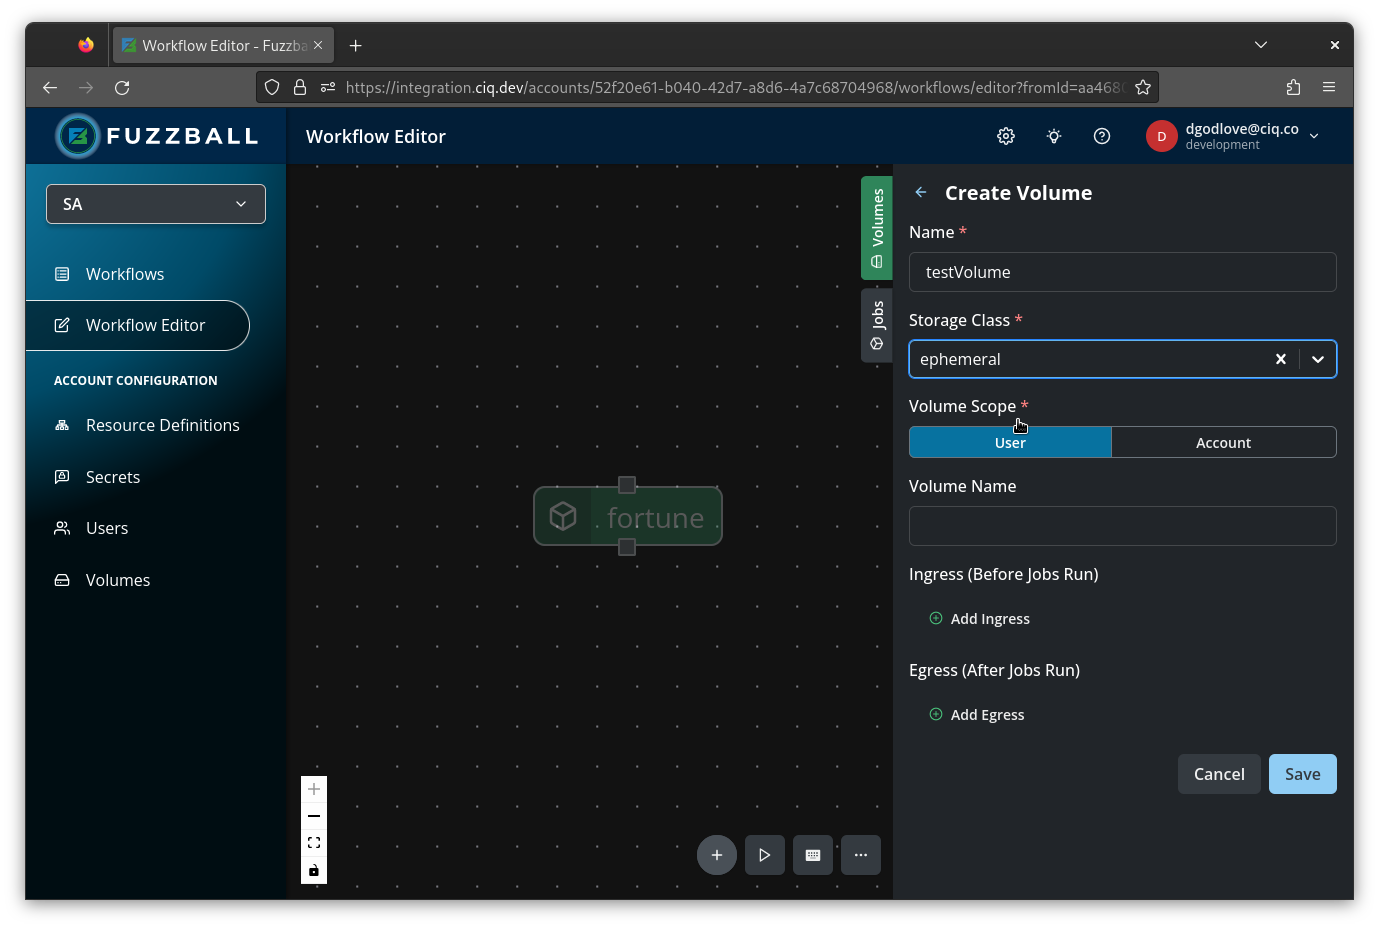
The volume configuration will be automatically saved.
Now you can click the fortune job card again and configure it to access the newly configured
volume!
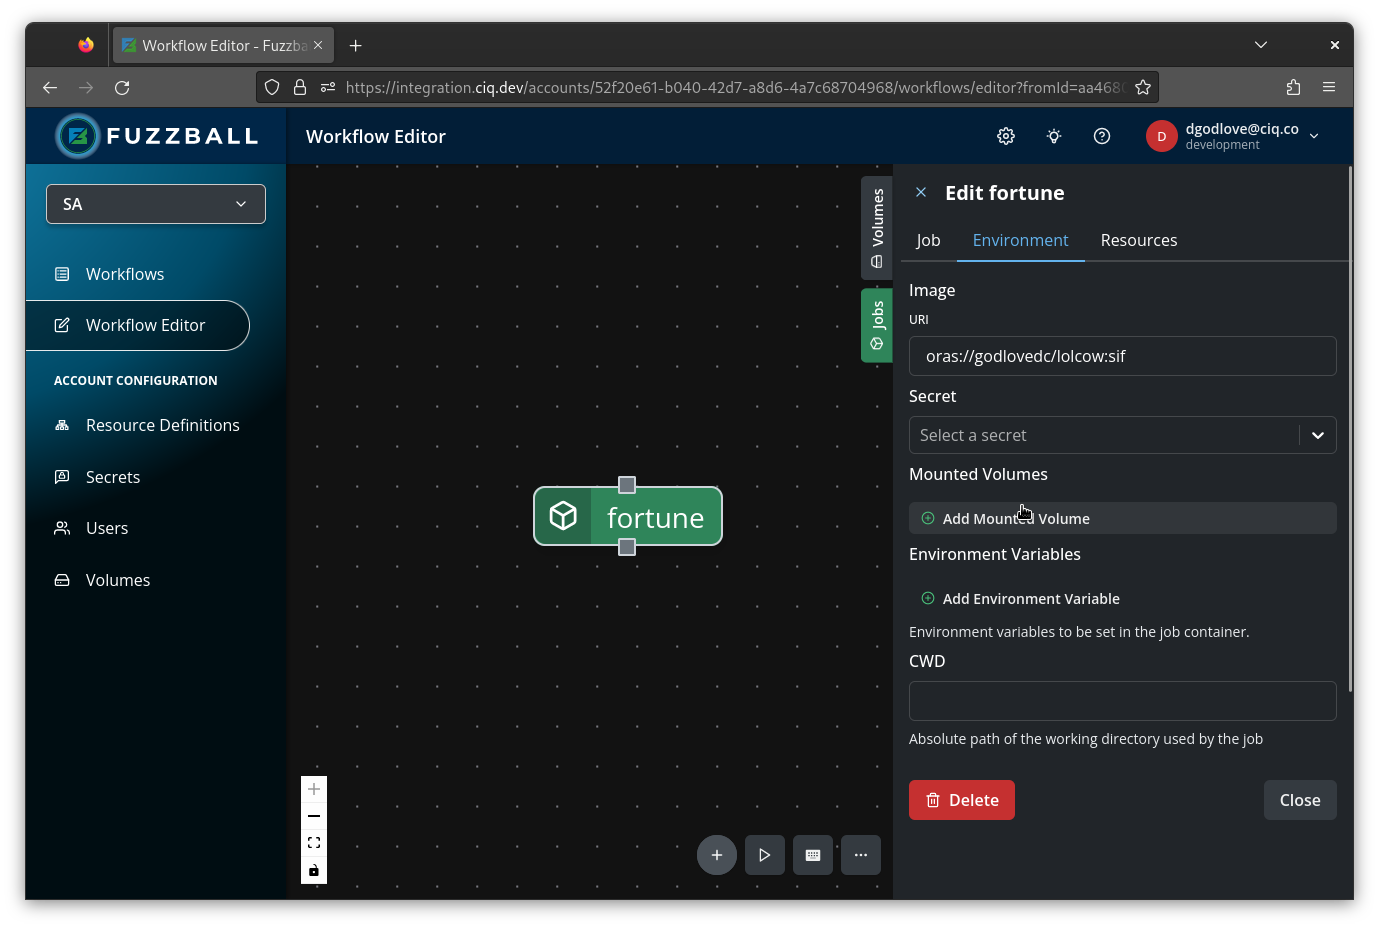
Under Environment, click “Add Mount” to attach a mounted volume.
Now select the test-volume we just created in the “Volume” drop down and set “Location” to
/tmp.
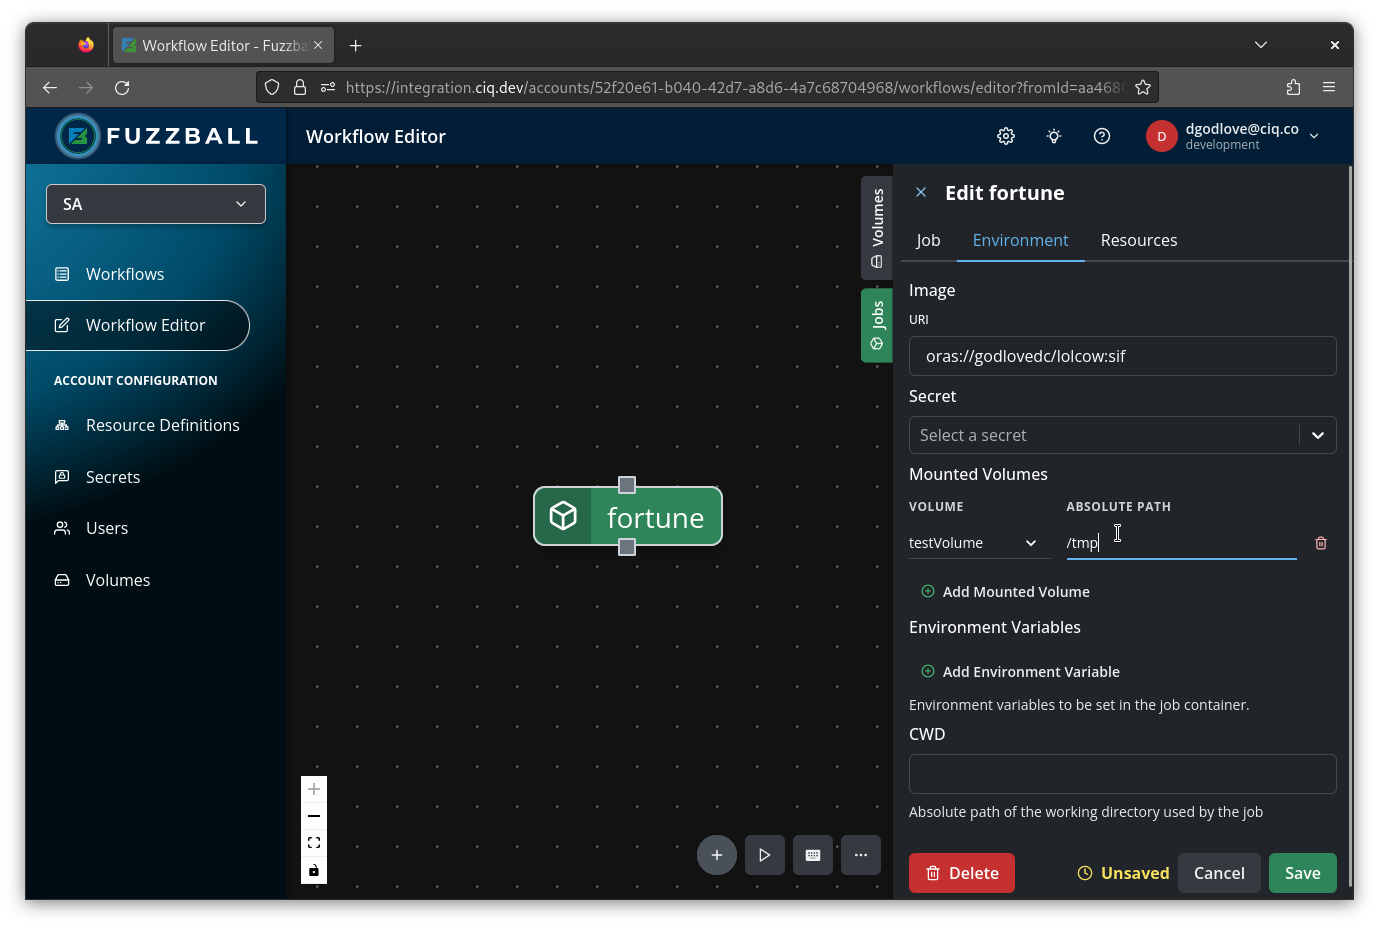
The job fortune will now write its output to an ephemeral volume (that can be used by other jobs
in the same workflow) instead of just writing to /tmp within the container.
Great! Now you are ready to add a second dependent job that will take the data written by the
fortune job and further process it. You can start by dragging a new job into place from the toolbar.
We’ll call it cowsay. Once you’ve named it, you can draw a line from the fortune job’s
attachment point to the new cowsay job to indicate the cowsay is dependent on fortune.
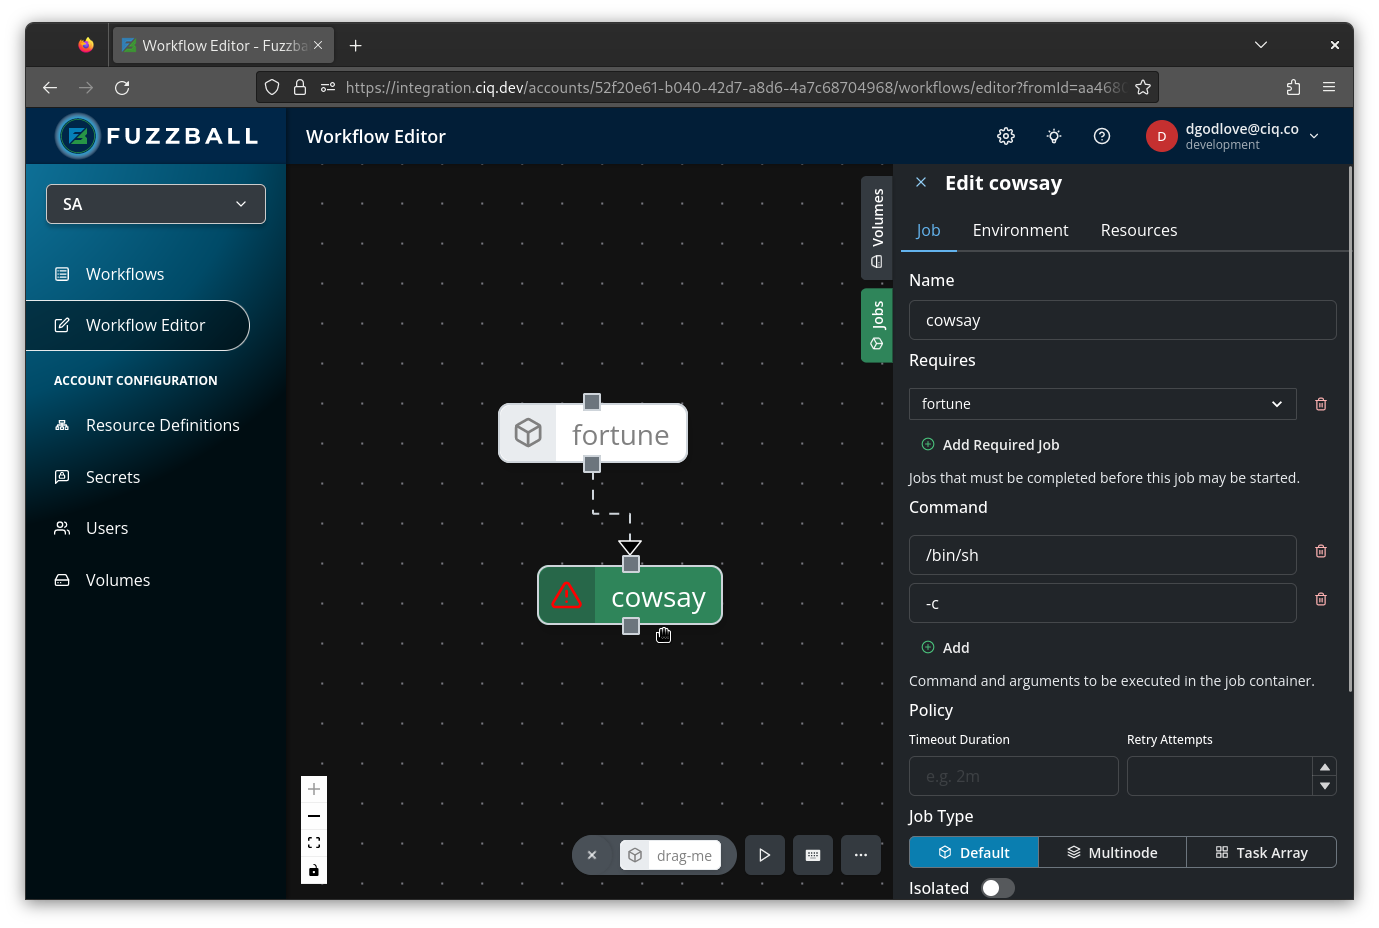
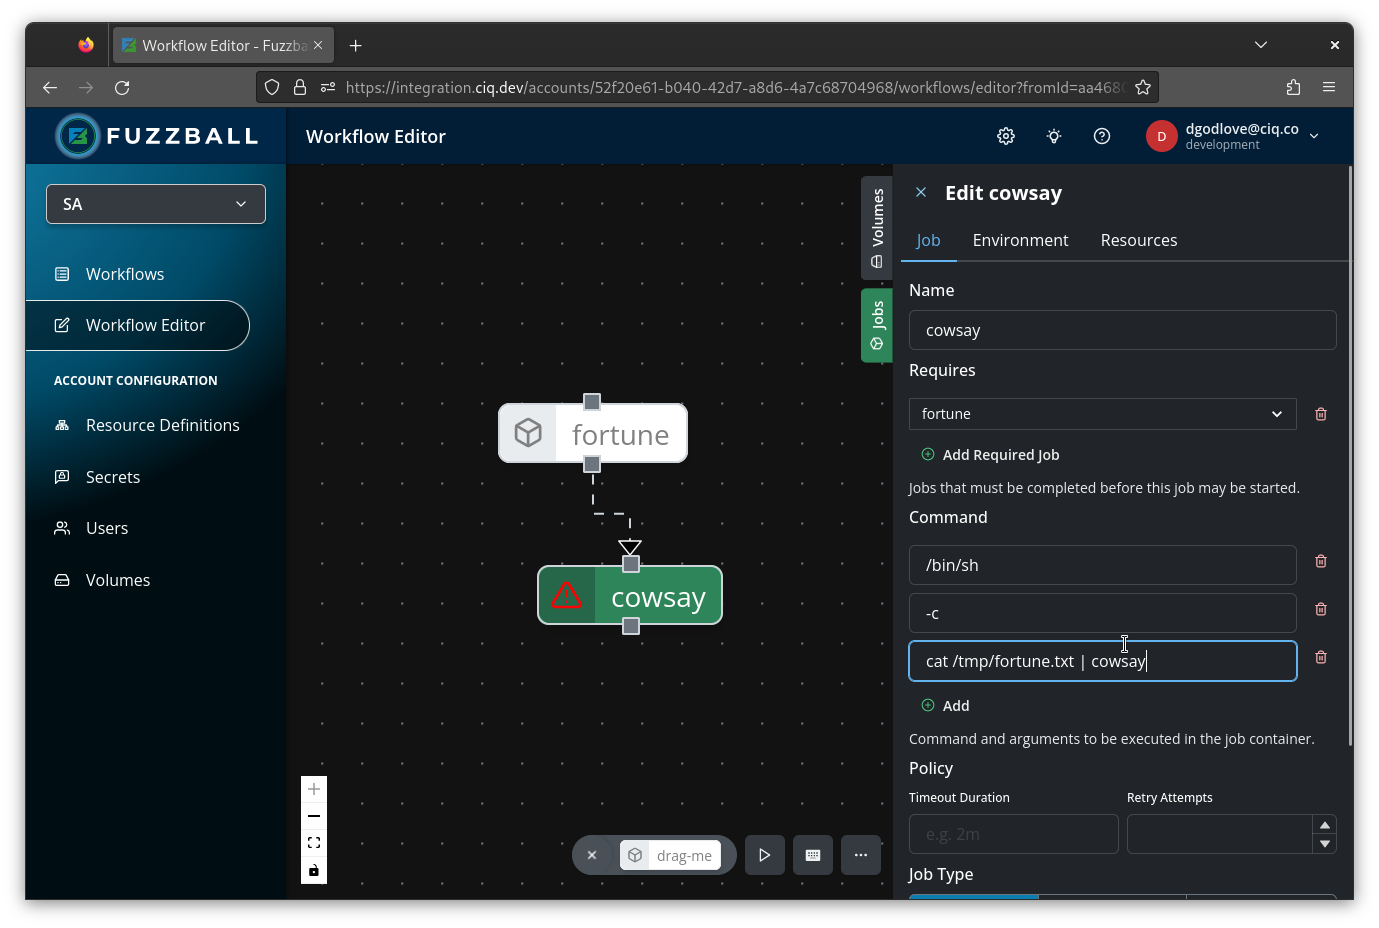
Now configure the cowsay job with the correct command to read the data from /tmp/fortune.txt and
pipe the output into the Cowsay program. The following should do the trick:
cat /tmp/fortune.txt | cowsay
Just as before, you can click on the Environment tab. Set this job to run in the same container
since the lolcow container has both the Fortune and Cowsay programs. And you can also make sure that
the test-volume is mounted at /tmp.
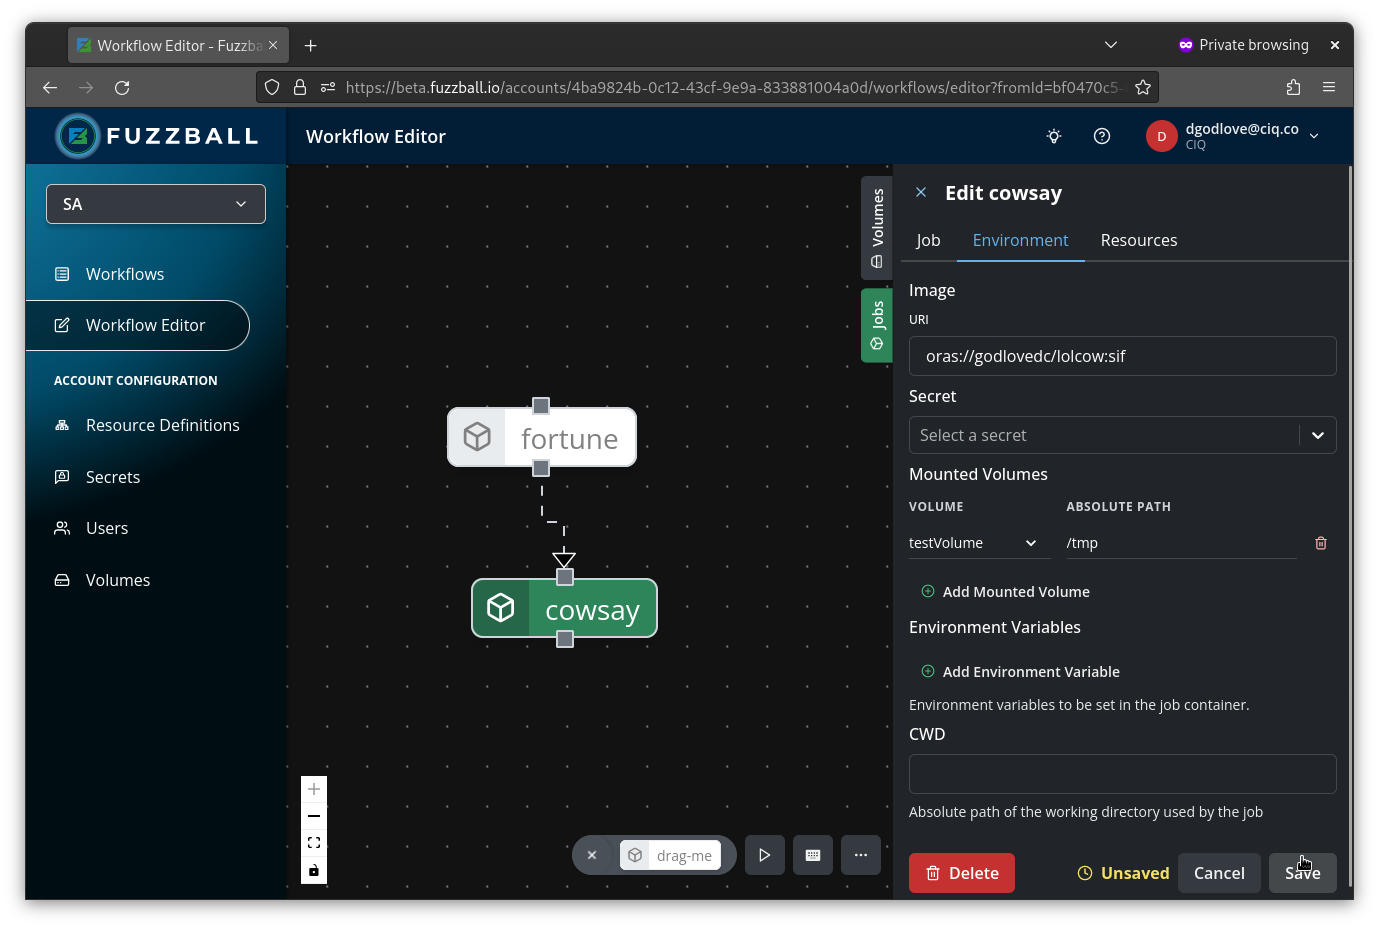
To finish the workflow, you can allocate
resources for the cowsay job. A single
CPU and 1GB memory is plenty.
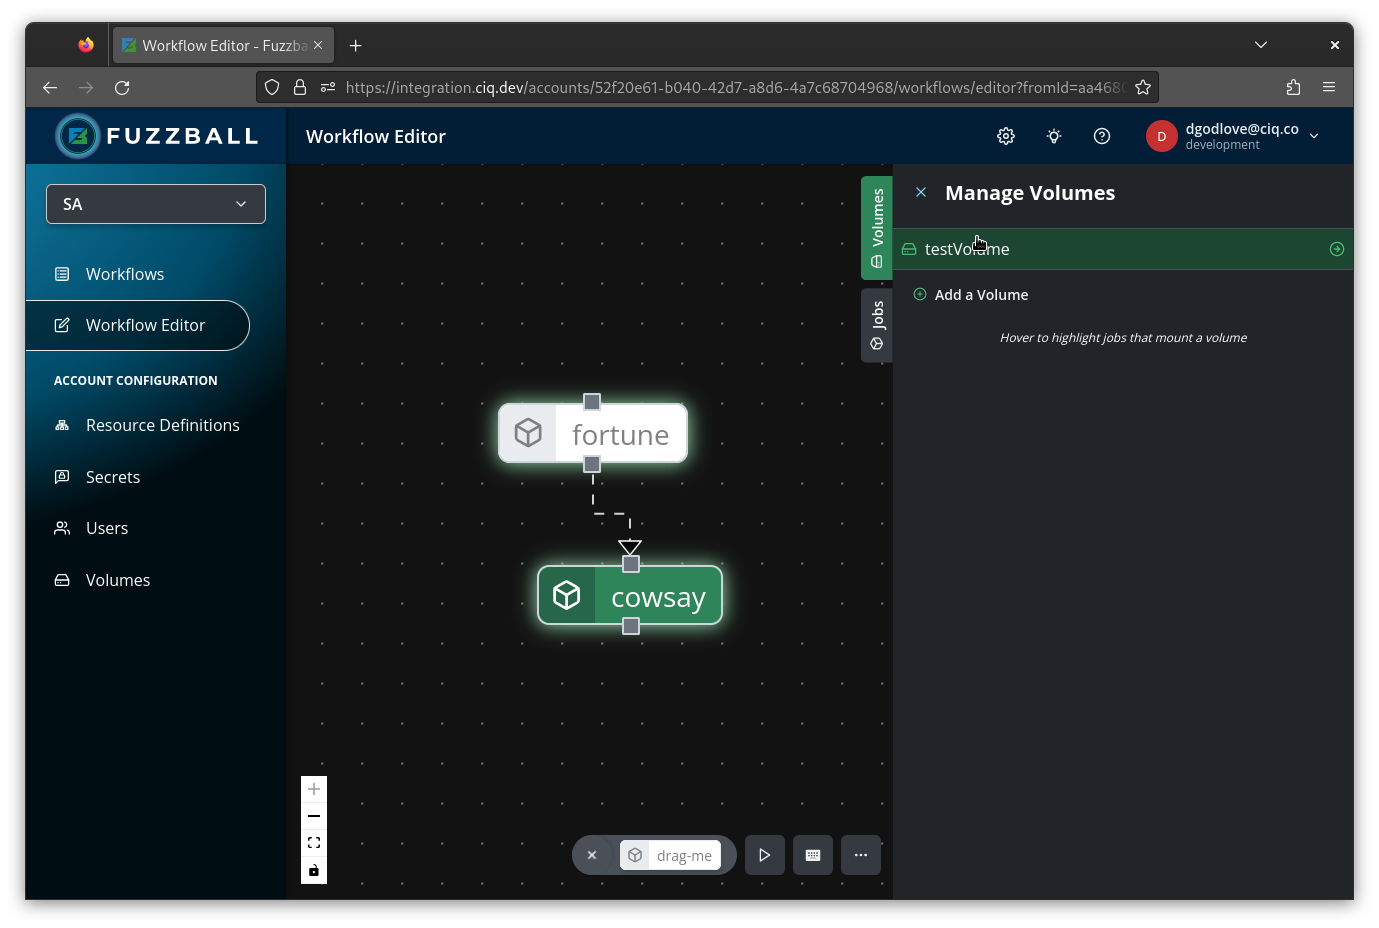
Once you have finished setting up the cowsay job you can hover your pointer over the
test-volume card on the grid. The jobs that are using this volume are highlighted with a glow
effect.
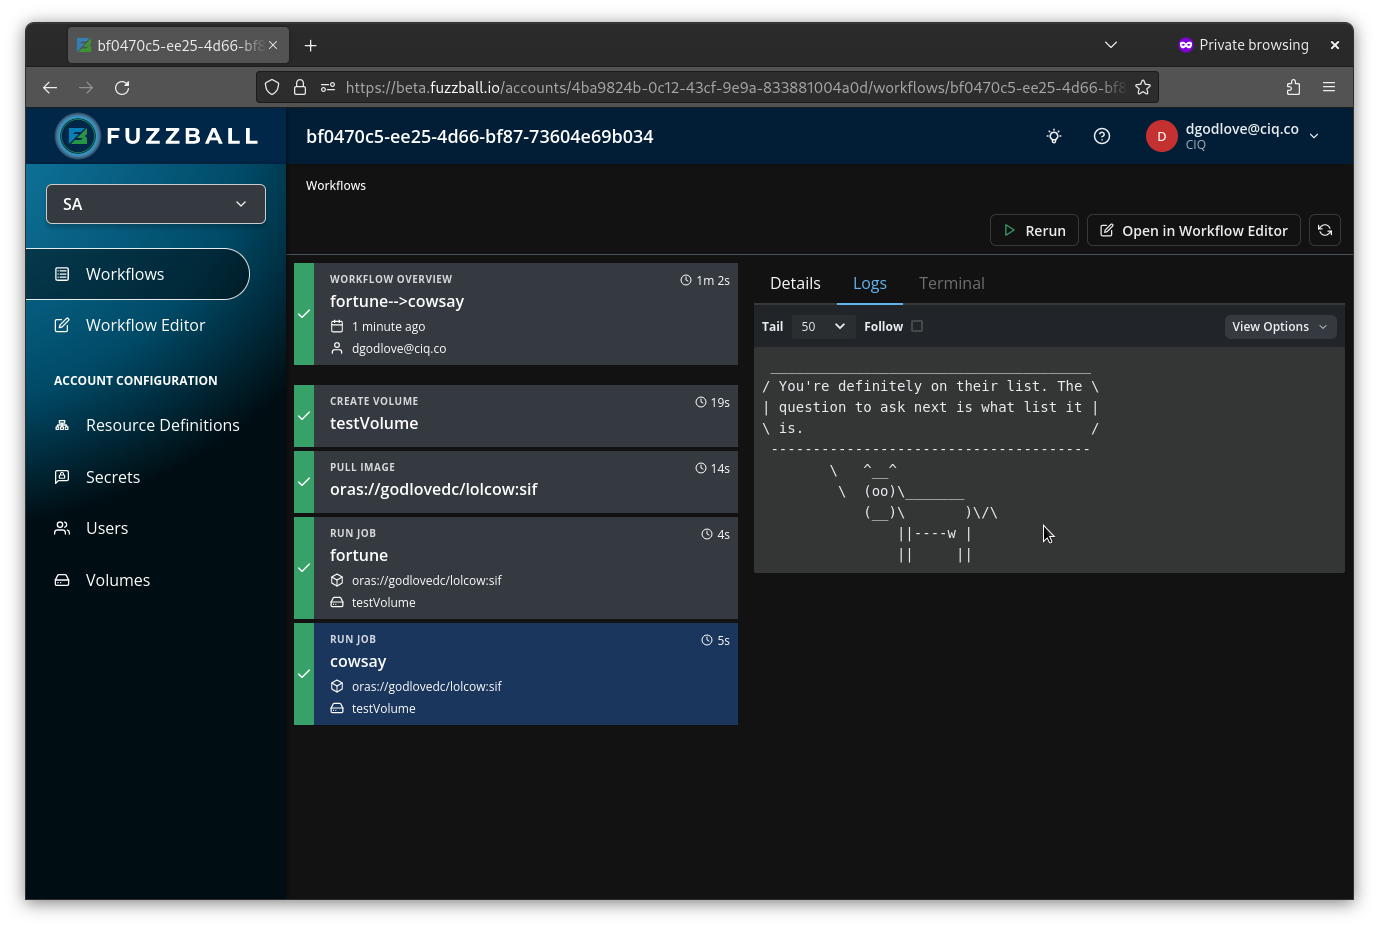
Now you can submit the workflow as before by clicking the “Start” button at the top right of the editor and optionally naming it. After it completes you should see something like this.
This example breaks trivial operations into multiple jobs for illustrative purposes. In practice it is usually better to carry out more than one operation in the same job if it is easy to do so.
As in the last section, you can see the Fuzzfile at any time from the Workflow Editor by clicking the ellipsis menu in the lower right of the workflow grid and selecting “Edit YAML” or by pressing “e” on your keyboard. You can also view the Fuzzfile by clicking on the “Definition” tab in the “Workflows” dashboard. Now that we’ve added an additional job and an ephemeral volume for the jobs to share, the Fuzzfile that is generated by the Workflow Editor looks a bit more complicated than it did in the last section.
version: v4

volumes:
  test-volume:
    use: ephemeral
    size: 1GB

jobs:
  fortune:
    mounts:
      /tmp: test-volume
    image:
      uri: docker://wresch/lolcow
    script: |
      #!/bin/sh
      fortune >/tmp/fortune.txt
    resource:
      cpu:
        cores: 1
      memory:
        size: 1GB
  cowsay:
    depends-on:
      - name: fortune
        status: FINISHED
    mounts:
      /tmp: test-volume
    image:
      uri: docker://wresch/lolcow
    script: |
      #!/bin/sh
      cat /tmp/fortune.txt | cowsay
    resource:
      cpu:
        cores: 1
      memory:
        size: 1GB
If you want to replicate this or any of the workflows in these examples, but you don’t want to manually recreate them using the Workflow Editor, you can always copy and paste this text into a file and open the file in the Workflow Editor. Or you can just press “e” to open the text editor window in the Workflow Editor and paste in this text!
Since the example above mounts the same volume in all jobs the fuzzfile can be simplified by specifying default mounts which will apply to all jobs in the workflow:
version: v4
volumes:
  test-volume:
    use: ephemeral
    size: 1GB

defaults:
  job:
    mounts:
      /tmp: test-volume

jobs:
  fortune:
    image:
      uri: docker://wresch/lolcow
    script: |
      #!/bin/sh
      fortune >/tmp/fortune.txt
    resource:
      cpu:
        cores: 1
      memory:
        size: 1GB
  cowsay:
    depends-on:
      - name: fortune
        status: FINISHED
    image:
      uri: docker://wresch/lolcow
    script: |
      #!/bin/sh
      cat /tmp/fortune.txt | cowsay
    resource:
      cpu:
        cores: 1
      memory:
        size: 1GB
In the next section we will add a few more jobs that can run in parallel and show how data ingress and egress allow you to import and export data to your workflow.